

Stroud weir
Restoring fish passage in the Karuah River: the installation of a rock-ramp fishway at Stroud Weir
The Stroud Weir, on the Karuah River, was identified as a priority for remediation because it was a significant barrier to fish moving both upstream and downstream. In this case, the most suitable remediation was the construction of a rock-ramp fishway. This is one of the many barriers to fish passage that have been assessed and remediated by NSW DPIRD in conjunction with various partners, including the Catchment Management Authorities (now Local Land Services), local councils, local landholders, and structure owners.
The project, completed in 2007, and was:
- An initiative of NSW Department Primary Industries (Fisheries)
- Funded by NSW DPIRD (Fisheries) and MidCoast Water
- Designed by Fishway Consulting Services
- Project managed by Mid Coast Water
- Constructed by Soil Conservation Services
The series of images that follow tell the story of restoring fish passage to this section of the Karuah River.
Thanks to Soil Conservation Services for permission to use their photographs.
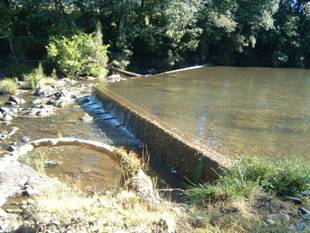
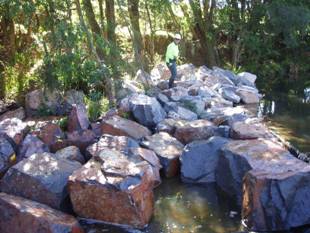
The Stroud Weir blocked fish movement both upstream and downstream due to the difference in water levels either side of the weir.
Steps to construct a fishway
- Set up systems
- Set up site
- Bulk rock to graded sides of channel
- Set up & build fish way channel
- Saw cut notch for channel
- Epoxy the cut notch
- Commissioning
- Demobilisation
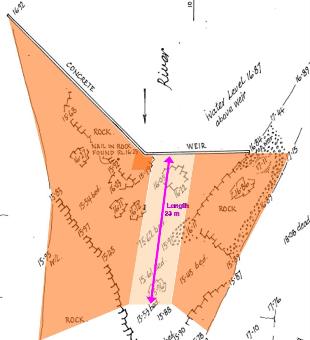
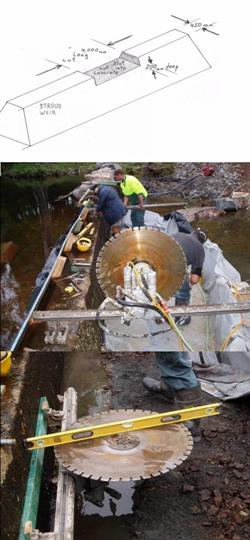
The plan for the new rock-ramp fishway - bed level surveys allow the correct fish passage option to be determined.
1. Set up systems
Developing a Project Management Plan (PMP) can be an involved process but is essential to ensure the safe and efficient completion of the project. The site-specific plan has to include:
- Safety Management Plan (SMP)
- Environmental Management Plan (EMP)
- Quality Management Plan (QMP)
- Construction Program
The PMP has to be approved before work can start.
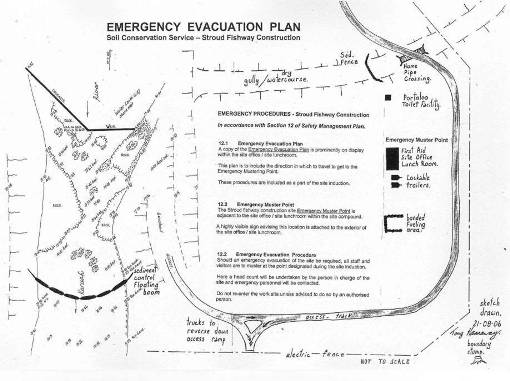
The emergency evacuation plan is essential and forms part of the Safety Management Plan.
2. Set up the site
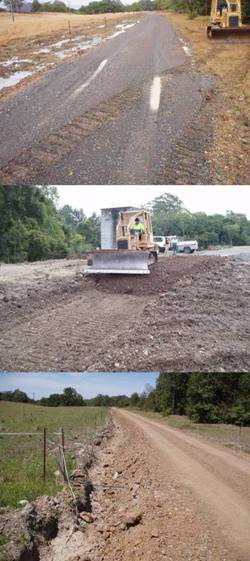
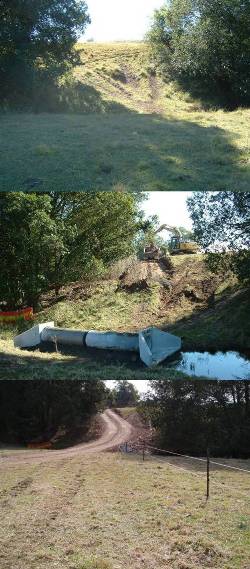
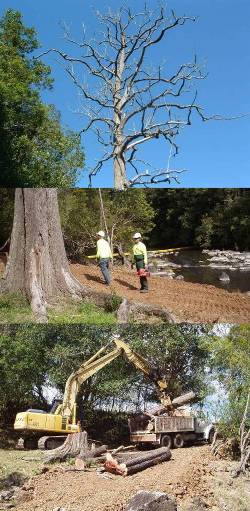
Safe access onto the property is very important. In this case, the access was not suitable for trucks and other heavy machinery (top). It had to be graded and resurfaced (middle) before it was good enough (bottom).
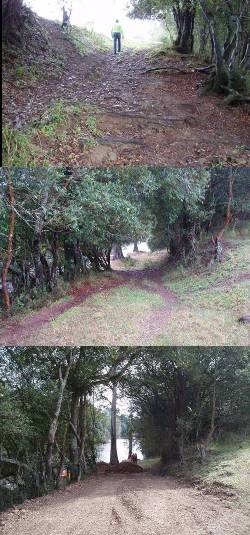
Two other access areas also needed to be remade. One, shown first, involved installing a pipe crossing to ensure the machinery could cross safely and did not damage a drainage line. The other, shown second, was a relatively steep and uneven ramp to the river. It had to be smoothed and flattened, and overhanging branches removed, to make sure it was safe for the trucks to use.
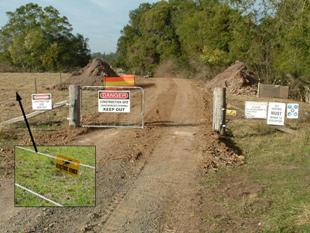
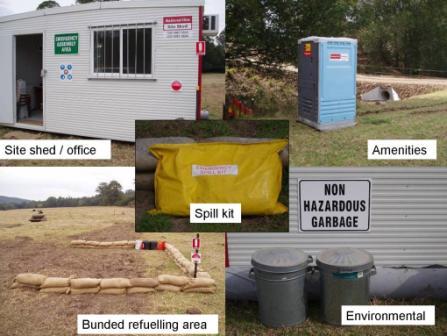
Signage and setting up amenities and emergency / environmental / safety systems also has to happen before work can begin. The site was a construction site and warnings had to be placed at the boundary (above). The other facilities (bottom) were located close to eachother. Their location in relation to the weir itself can be seen on the emergency evacuation map shown above.
Another site hazard was a "widow maker". This large, dead tree was removed by professionals.
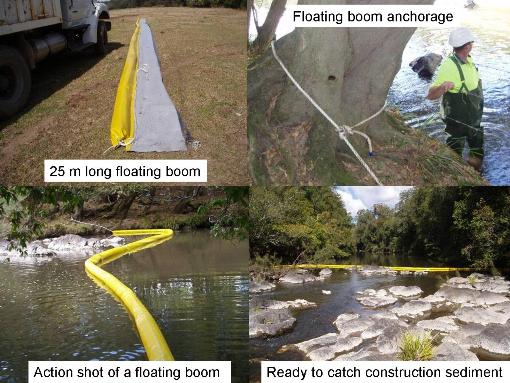
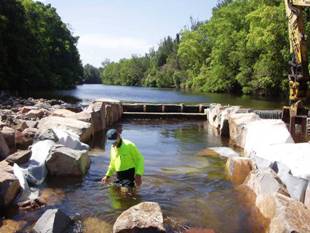
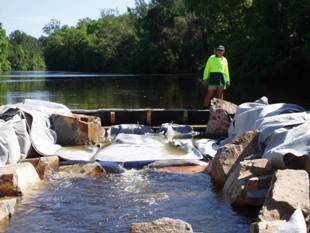
The final things that had to be done before work could start on the fishway itself were to install the floating boom and survey the site.
The floating boom is positioned downstream of the construction of the fishway. It is designed to catch sediment that comes from the work area.
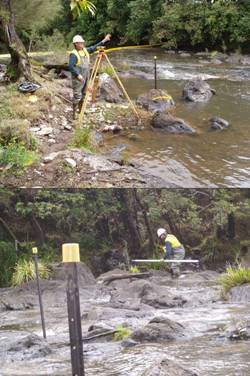
Finally, the site was surveyed to ensure the correct levels were used when the fishway was constructed. The fishway required a specific slope and position relative to the weir and the underlying riverbed to allow for fish passage.
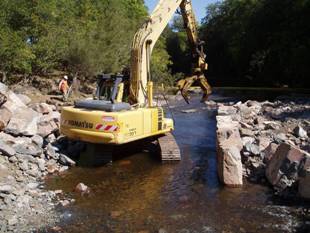
3. Bulk rock to graded sides of channel
This step involved creating the graded sides (high flow section) of the fishway, extending from the banks to the low flow channel itself.
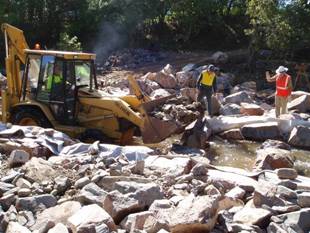
Firstly, a grader was used to create access over the bedrock.
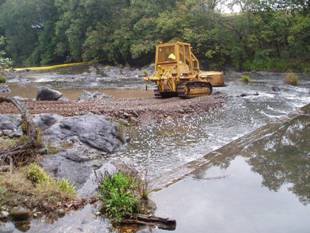
This meant that trucks and other machinery could now move safely and with limited impact onto the river channel where the fishway and graded banks were going to be constructed.
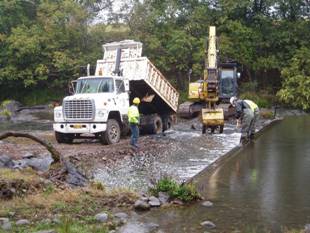
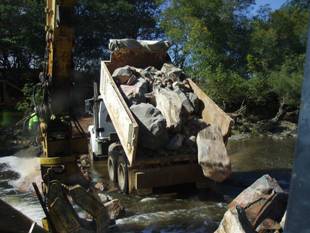
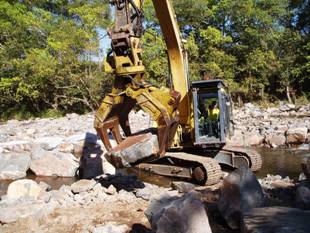
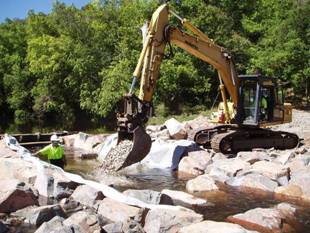
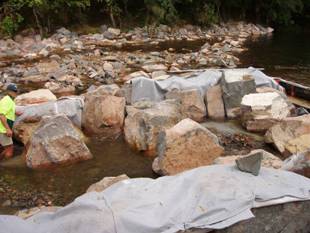
Bulk fill in the form of large rocks was delivered by truck and dumped into those areas that would form the graded banks.
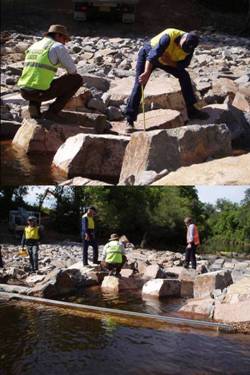
Individual rocks were then selected and put into position. Rock selection is particularly important so that individual rocks interlock with each other and strengthen the structure as a whole.
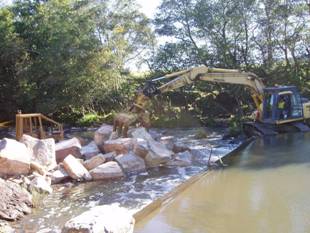
The graded banks were constructed from the far corner in towards the channel.
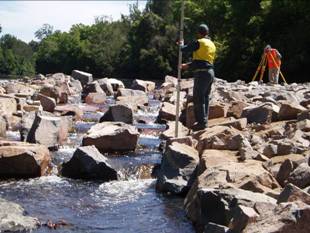
The levels of the rock placements were checked and paint markers are used to show the grade height across the bank.
Once the graded sides were completed, the low flow channel was cleared.
The outer wall of the fishway's low flow channel was created by positioning large rocks along each side of the channel, again being interlocked with each other to strengthen the structure.
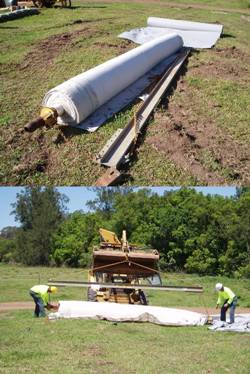
4. Setup and built the fishway channel
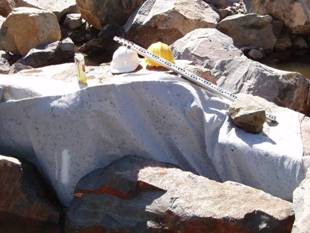
The fishway channel had to be lined with bentonite waterproofing sheet. This came in a one tonne roll and a specialised handling cradle was neede to manoeuvre it.
The bentonite sheet was laid on a graded gravel bed of the fishway channel.
The bentonite sheet was held in place by a row of inner wall rocks.
Ridge rocks were installed at 2m intervals along the length of the fishway channel. The ridge rocks are situated within the channel itself and help create fish resting pools.
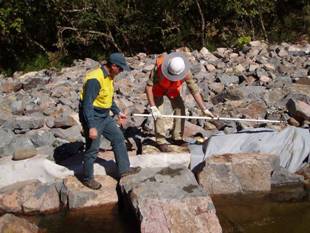
With the first two ridges of the low flow fishway in place it was possible to get a sense of what it would look like.
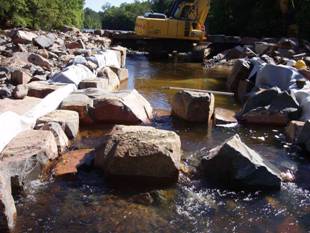
The low flow channel of the fishway was built from the bottom to the top, close to the weir.
At each stage, the bentonite sheets were laid with an overlap of 500mm (50cm).

A layer of gravel was put over the bentonite so that it didn't tear when the ridge rocks were installed.
The base of the fish resting pools are covered with small to medium sized rock and gravel.
This process continues until the whole of the fishway channel was lined with bentonite sheet.
Where possible, water was diverted around the fishway channel to make it easier to work.
The height of the ridge rocks was also checked to ensure each had only 20mm (2cm) variation.
The working fishway prior to the bentonite sheeting being trimmed.
5. Saw cut notch for channel
A notch needed to be cut into the weir wall to allow water to flow into the fishway. Specialised concrete cutting equipment was used. The saw was bolted to the wall and ran hydraulically. Both a longer horizontal cut and two vertical cuts are needed.
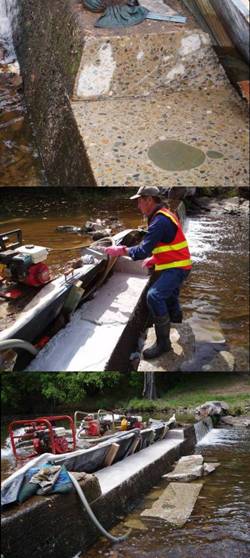
6. Epoxy the notch cut
Once the notch was complete and the section of the weir wall removed, the structure of the weir wall could be seen. The cut concrete showed aggregate, including river stones (top). To seal the sawn surface, primer and 20mm (2cm) of sand rich epoxy was applied to prevent rusting of metal stabilising rods (middle). Three pumps were used to divert the water and keep the sawn area dry until the epoxy resin is set (bottom).
7. Commissioning
All the specifications were checked, including the 20mm tolerance at the ridge rocks. Other design compliance issues were also checked.
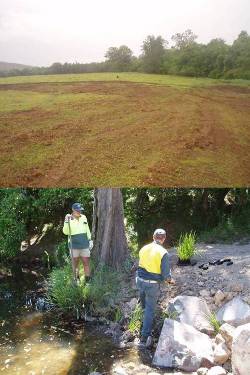
8. Demobilisation
For the project to be completed, the site had to be returned to its previous state - or to a state agreed to at the beginning of the project. In this case, the construction office site was left clean and tidy (top) and the work site itself was rehabilitated using local native plants (bottom).
Troubles
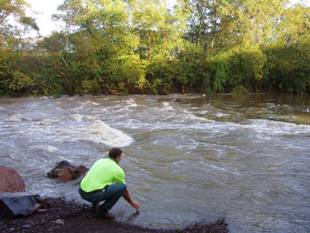
Any project will have some glitches. The two major challenges for this project were a high river drowning out the work site and vandalism. The high river arrived in September following prolonged heavy rain - the outline of the weir can be seen in this photograph.
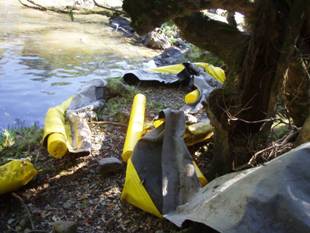
Theft and vandalism cost the project both time and money. One of the more troublesome events was the damage to the floating boom. It was slashed and its rope and weight chain were stolen.
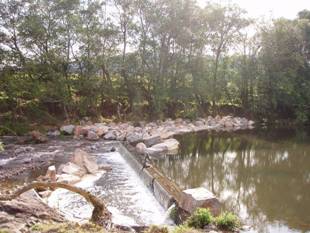
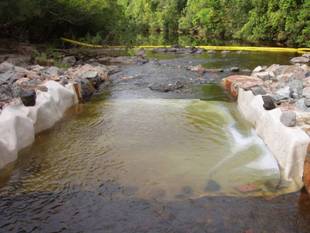
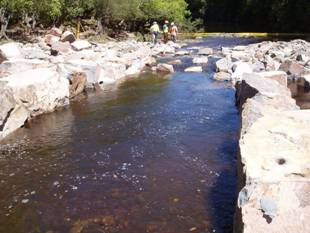
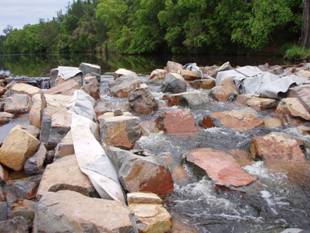
The completed fishway
The completed fishway at Stroud Weir on the Karuah River represents a significant improvement in fish access in this river, reopening access to approximately 34km of habitat upstream of the weir (7.8km of which was due to a remediated road crossing).
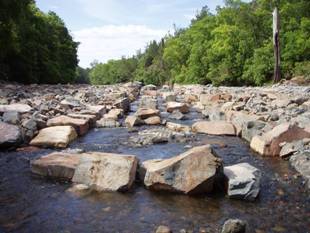
The fishway at Stroud Weir, November 2006
When the river is overtopping the weir, the stepped water surface above the fishway channel can be seen. At these flows the fish use the graded rock areas (high flow section) at the edge of the river to access upstream habitat.
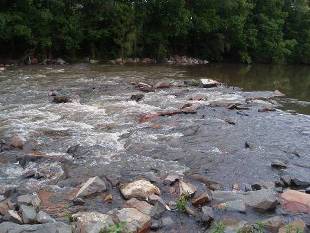
The Stroud Weir and fishway in December 2007
